To all who read this; Have a very Merry Christmas 😀
Month December 2018
Modding My Acoustic
My acoustic guitar, a Kiso Suzuki copy of a Gibson Hummingbird, is a great guitar. It has a warm sound, is beautiful to look at and feels great to play.
However, it has always had crap machine heads. It has been my intention for the longest time to change these but I never found myself getting around to doing it. Until the gear on the G strings tuner went blunt.
Now, I could just swap out the gear for a new one and carry on as I had before, but this seemed like the perfect time to take the plunge and give this guitar a nice set of Grovers.
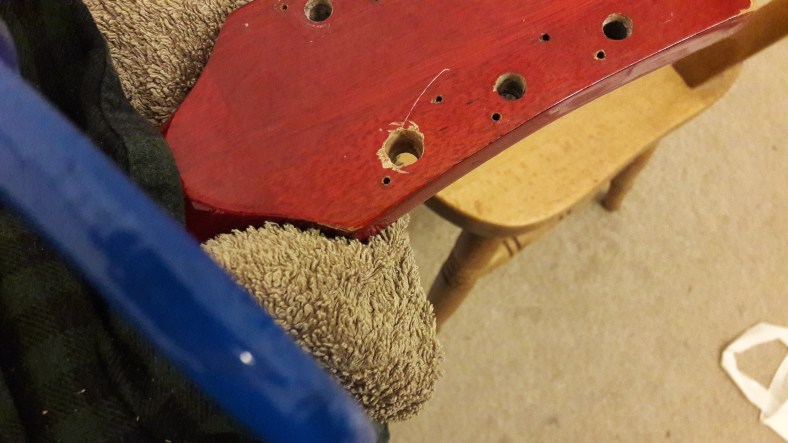
I went into this knowing that I would have to do some drilling. See those diagonal holes left by the screws of the old tuners? That design is mostly found in really cheap nasty machine heads, so I knew in order to attach the vintage looking Grover tuners I had bought that I would have to drill some small holes. That’s all I thought I would have to do, in reality things went a little bit differently.
Initially I bought a hand-operated manual drill and some very small drill bits, the idea being that if I had a hand drill instead of a power drill that I would be less likely to accidentally go all the way through the guitar.
Grovers require a wider hole for the shaft of the tuner to go through than the older (and cheaper) tuners do. Therefore, I was required to widen the existing hole to fit, before I could even think about drilling the new screw holes. This caused me to have to go out for another shopping trip and buy larger drill bits, as well as an entirely new chuck for the drill.
Once I had everything, I needed I began my work. In order keep the guitar still as I worked, I had to clamp the guitar to a table. To make sure I did not damage the guitar with the clap I laid the guitar down on a towel, and used a folded shirt to protect the guitars neck from the metal end of the clamp.
 With my new 10mm drill bit in hand I set to work on widening the existing holes, this is where one of the main issues with my method arose. As it would seem, hand drills aren’t designed for holes this wide, at least not on a hard wood like mahogany.
Even with the clamp holding the guitar steady against the table the drill kept catching. This is due to the slow speed of a manual drill; a power drill would spin so fast that it would catch far more infrequently.
 Now at this point I would like to reiterate that this is by no means a tutorial, and I would certainly not recommend using any of my methods on your own guitar. At this point I was days behind where I wanted to be and very impatient so I simply decided to brute force it.
Whenever my drill would catch, I would turn it back and forth in order to chip away at the wood and widen the hole. This method, no matter how crude was somewhat effective. Each hole took around 20 minutes to widen, far longer than the sub-minute time it would have taken with a power drill.
My original goal of using a manual hand drill instead of a power drill was to reduce the chance of my inexperience with drills causing me to drill right through the headstock. However, I still managed to drill straight through on the D string’s hole. Luckily this wasn’t a massive issue, and both the washer and the nut that go over the machine head hides this.
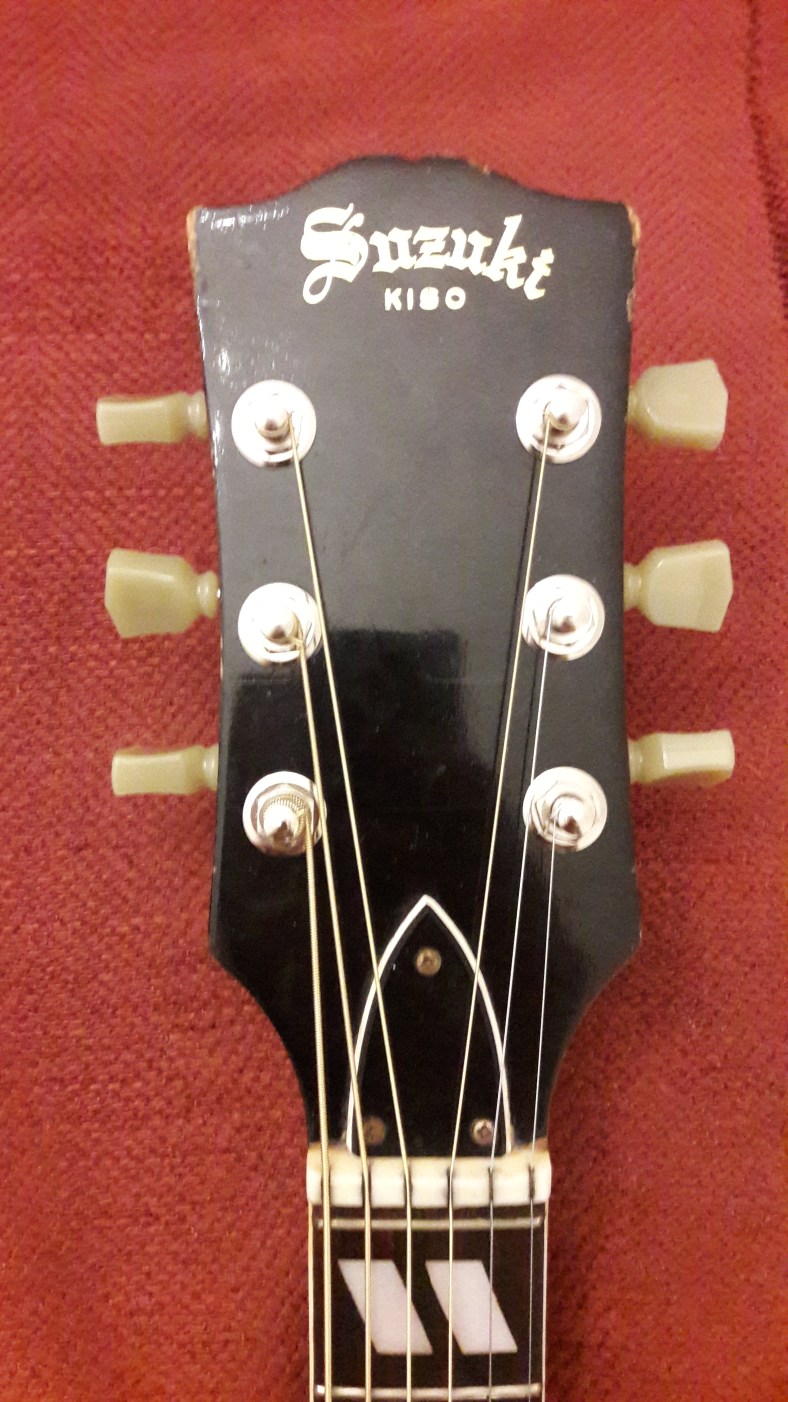
With all holes now widened I fitted the machine heads, and screwed in their washers and nuts. Using a ruler to align them and keep them straight I was ready to move onto the next part of the procedure.
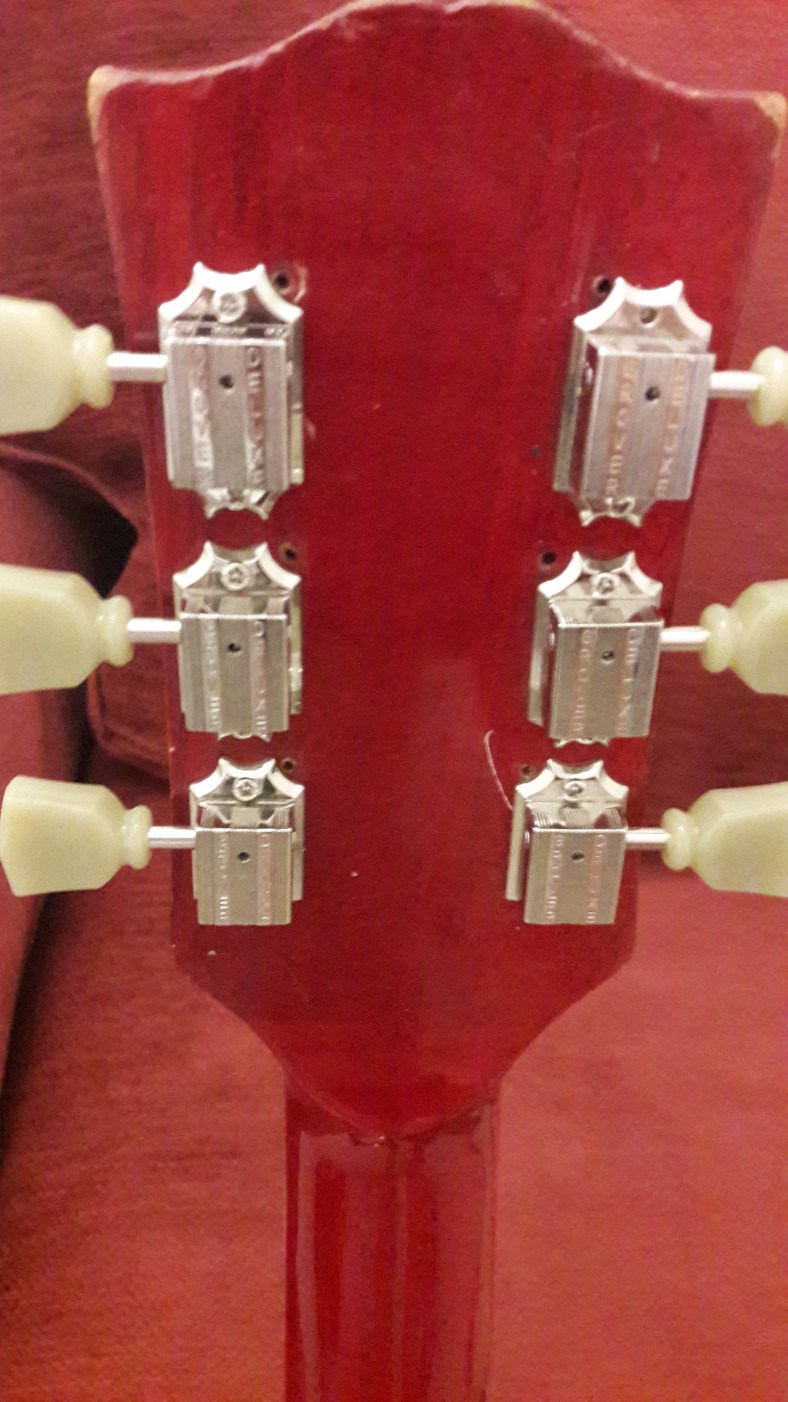
When I started, I was under the impression that the only drilling I would have to do would be for the small screws that keep the machine heads held down, hence the choice of drill. Luckily for me the screws were also self-tapping which made my life easier. For each hole I drilled a very small hole, and then used a screwdriver to screw the screw into place, whilst still using the ruler to keep everything straight.
This part of the procedure was relatively easy, although there was one peculiar thing that happened. As you can see in the picture above, the top screw on the D string appears to be missing. In reality, only the top of the screw is missing, the rest of the screw is now stuck inside the headstock…. Whilst screwing it in the top twisted right off. I had considered whether or not to glue the top in or not. But decided to go by the old rule that you should never glue something onto a guitar which may need removing later.
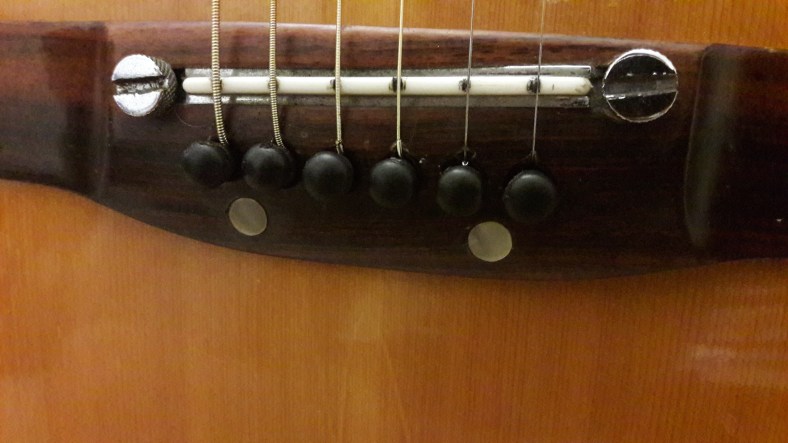
With all six machine heads now in place there was only one modification left to do: placing the new ebony bridge pins. Once again, the theme for this whole episode continued as yet another potential easy procedure suddenly got a little bit more difficult. The bridge pins seemed too wide for the holes in the bridge.
Without wanting to give up so close to the finish I got out my trusty pliers and with some time and patience was able to make my new bridge pins fit. After restringing and tuning up the guitar it was good to go, and sounding great.
I learnt a lot from this experience, mostly what not to do next time, but I would definitely do it again.
Album Pickups – November 2018
There was no album pickups video for October due to an order never arriving, but luckily November proved to be more fruitful.
Album : Crowbar – Symmetry in Black
If you enjoyed please subscribe
Merry Christmas
Merry Christmas! Here is a cover of Status Quo’s ‘It’s Christmas Time’ with my own twist.
